How to Create Perfect Buttercream Rosettes A Step-by-Step Guide

How to Create Perfect Buttercream Rosettes A Step-by-Step Guide

How to Create Perfect Buttercream Rosettes: A Step-by-Step Guide 🌹🎂

How to Create Perfect Buttercream Rosettes: A Step-by-Step Guide 🌹🎂

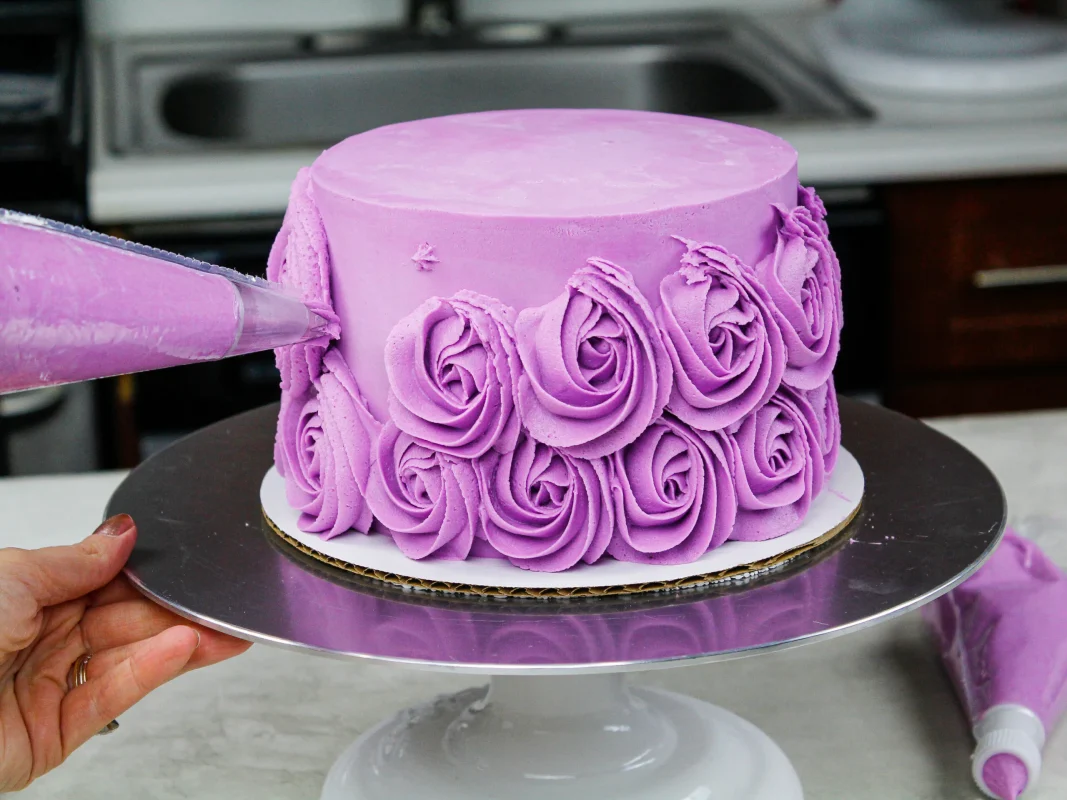
Continuing our cake decorating series, we’ve covered the essentials: from the best cake batters and fillings to professional-looking decorations and frosting recipes. Now, it’s time to focus on one of the most classic and visually stunning techniques in cake decorating: buttercream rosettes. These elegant, swirling flowers can instantly elevate any cake, giving it a refined, bakery-worthy finish.

In this article, we’ll walk you through a simple step-by-step process to master buttercream rosettes like a pro! Whether you’re decorating cupcakes, layer cakes, or even cookies, these beautiful rosettes will be your go-to technique for adding an extra touch of class. 💐🍰

What You’ll Need:

  • Buttercream frosting (a stable, firm texture works best)
  • Piping bags
  • Open star piping tip (Wilton 1M or similar)
  • Food coloring (optional)
  • Offset spatula
  • A cooled, crumb-coated cake (or cupcake)

Step-by-Step: How to Pipe Buttercream Rosettes 🌸

  1. Prepare Your Buttercream Frosting First, make sure your buttercream frosting has a stiff consistency—this will help your rosettes hold their shape. If needed, chill it in the fridge for about 15-20 minutes before use.

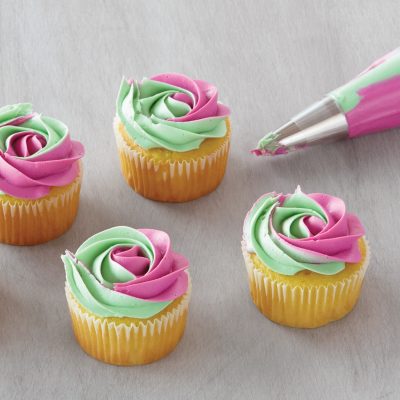
  2. Fill Your Piping Bag Attach your open star piping tip to your piping bag and fill it with buttercream. If you want multicolored rosettes, you can stripe the bag with different colors of buttercream for a beautiful gradient effect.

  3. Hold the Bag Properly Hold your piping bag at a 90-degree angle over the cake surface. Apply even pressure with your dominant hand while using the other hand to guide the bag.

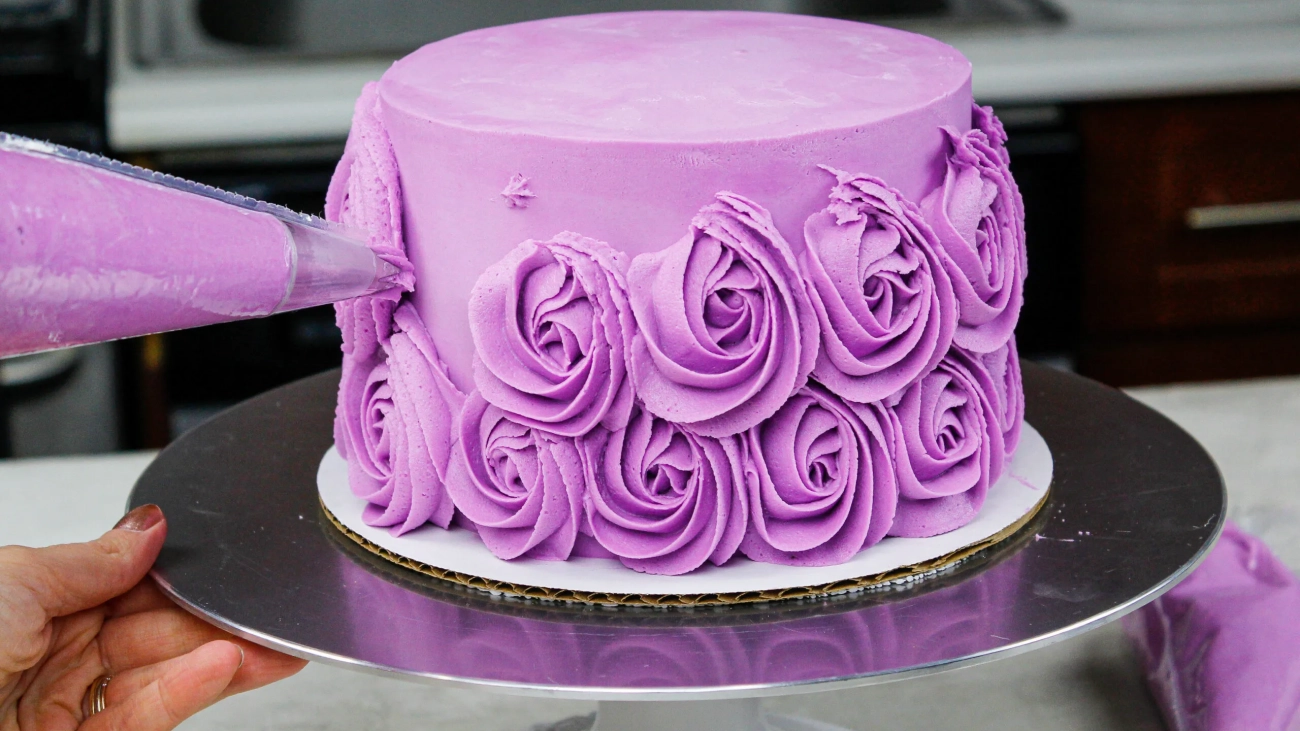
  4. Start Piping the Rosette Begin piping from the center of where you want the rosette to be. Start in the middle and, using a spiral motion, pipe outward to create a swirl. Continue until you’ve created a rose-like shape. Release pressure gently as you reach the end to make a clean finish. 💫

  5. Spacing Your Rosettes Continue piping rosettes around the cake, leaving a small gap between each for a more delicate look. If you want a fuller effect, pipe the rosettes close together to cover the entire surface.

  6. Smooth the Edges (Optional) If you notice any imperfections, use an offset spatula to gently fix the edges. If your buttercream has softened, chill the cake briefly to firm up the designs.


Tips and Tricks for the Perfect Rosettes:

  • Temperature Matters: If your buttercream is too soft, your rosettes may lose their shape. Cool the buttercream if necessary.
  • Consistent Pressure: Apply even pressure throughout piping for smooth, uniform rosettes.
  • Practice First: Try piping a few rosettes on a piece of parchment paper before decorating your cake to get comfortable with the motion.

Decorating Ideas Using Buttercream Rosettes 🌷

  1. Ombre Rosettes: Start with one color of buttercream and gradually add more food coloring to achieve a gradient effect as you pipe.
  2. Rosette Cupcakes: Add a single rosette to the top of cupcakes for a simple yet elegant design.
  3. Rosette Borders: Use smaller rosettes to create a border around the top or bottom edge of your cake.

Final Thoughts: Buttercream rosettes are a versatile and elegant addition to any cake. With practice, this beautiful decoration technique will become second nature. Whether you’re making a birthday cake, wedding cake, or just a special treat, rosettes will always impress. 🌹💖

5 Essential Cake Frosting Recipes for Every Baker

5 Essential Cake Frosting Recipes for Every Baker

5 Essential Cake Frosting Recipes for Every Baker 🎂🍰

5 Essential Cake Frosting Recipes for Every Baker 🎂🍰

Frosting is the finishing touch that turns a simple cake into a masterpiece. Whether you’re looking for a rich, buttery texture or something light and airy, having a few go-to frosting recipes is essential. These 5 frosting recipes will not only complement your cakes but also add that professional touch that makes them irresistible. Ready to up your cake decorating game? Let’s dive into these easy yet impressive frostings that will take your cakes to the next level! 🎉


1. Classic Buttercream Frosting 🍥

This is a staple in cake decorating, and it’s beloved for its rich, creamy texture. Perfect for piping and spreading, classic buttercream is versatile and can be flavored or colored to suit any occasion.

Ingredients:

  • 1 cup unsalted butter (softened)
  • 4 cups powdered sugar
  • 2 teaspoons vanilla extract
  • 2-4 tablespoons heavy cream

Instructions:

  1. In a bowl, beat the butter until creamy and smooth.
  2. Gradually add the powdered sugar, one cup at a time, beating on low speed.
  3. Add the vanilla extract and 2 tablespoons of heavy cream.
  4. Beat on high speed for about 3-4 minutes until light and fluffy. Add more cream for a softer consistency.
  5. Use immediately to frost your cake or store it in the refrigerator for up to a week. 🍰

2. Whipped Cream Frosting 🍦

Light, airy, and not overly sweet, whipped cream frosting is perfect for those who prefer a less dense frosting. It’s ideal for summer cakes or when paired with fresh fruits. 🍓

Ingredients:

  • 2 cups heavy whipping cream
  • 1/4 cup powdered sugar
  • 1 teaspoon vanilla extract

Instructions:

  1. In a chilled bowl, whip the heavy cream on medium speed.
  2. Gradually add the powdered sugar and vanilla extract.
  3. Continue whipping on high speed until stiff peaks form. Be careful not to overbeat or it will become grainy.
  4. This frosting is best used immediately, as it can deflate over time. 🌿

3. Cream Cheese Frosting 🧀

For lovers of tangy, creamy goodness, cream cheese frosting is the way to go. This is perfect for cakes like red velvet, carrot, or any cake that benefits from a little extra richness.

Ingredients:

  • 8 oz cream cheese (softened)
  • 1/2 cup unsalted butter (softened)
  • 4 cups powdered sugar
  • 1 teaspoon vanilla extract

Instructions:

  1. Beat the cream cheese and butter together until smooth.
  2. Gradually add the powdered sugar, one cup at a time, until fully incorporated.
  3. Stir in the vanilla extract and beat on high speed for 2-3 minutes.
  4. This frosting is best served at room temperature but can be stored in the refrigerator for up to a week. 🧁

4. Ganache Frosting 🍫

Ganache is a luxurious, glossy frosting that pairs beautifully with rich cakes like chocolate or espresso. It can be used as a smooth glaze, whipped frosting, or even piped when cooled.

Ingredients:

  • 8 oz semi-sweet chocolate (chopped)
  • 1 cup heavy cream
  • 1 teaspoon vanilla extract (optional)

Instructions:

  1. Heat the heavy cream in a saucepan until it starts to simmer.
  2. Pour the cream over the chopped chocolate and let it sit for 2-3 minutes.
  3. Stir until the chocolate is fully melted and smooth.
  4. Let it cool slightly if using as a glaze, or whip it on medium speed once completely cooled for a fluffier frosting. 🍫✨

5. Swiss Meringue Buttercream Frosting 🇨🇭

Swiss Meringue Buttercream is a bit more technical, but the results are worth it. It’s silky, smooth, and less sweet than traditional buttercream, making it a favorite for wedding cakes and more refined desserts.

Ingredients:

  • 5 large egg whites
  • 1 1/4 cups sugar
  • 1 1/2 cups unsalted butter (softened)
  • 1 teaspoon vanilla extract

Instructions:

  1. In a heatproof bowl, whisk together the egg whites and sugar. Place the bowl over a simmering pot of water (double boiler) and whisk continuously until the mixture reaches 160°F or until the sugar has dissolved.
  2. Remove from heat and beat the mixture on high speed until stiff peaks form and the bowl is cool to the touch (about 10 minutes).
  3. Add the butter, a tablespoon at a time, beating on medium speed. Once all the butter is added, switch to high speed and beat until smooth and silky.
  4. Stir in the vanilla extract and use immediately or store in the refrigerator. 🎂

Conclusion: Elevate Your Cakes with These 5 Frostings

From the classic buttercream to the decadent ganache, these frosting recipes will add that special touch to your cakes. Whether you’re baking for a party or just for fun, these frostings will make your cakes taste as good as they look. So get ready to impress your family and friends with your new frosting skills! 😍✨


best 5 easy cake decorations that look professional

Best 5 Easy Cake Decorations That Look Professional

best 5 easy cake decorations that look professional

Best 5 Easy Cake Decorations That Look Professional 🎂✨

Best 5 Easy Cake Decorations That Look Professional 🎂✨

When it comes to cake decorating, many people think that achieving a professional look requires years of practice and expensive tools. But guess what? You don’t need to be a pro to make your cakes look absolutely stunning! With a few simple tricks and techniques, you can create beautiful cakes that will leave everyone wondering which bakery you bought them from. 😉 In this article, we’ll share 5 easy cake decoration ideas that are simple to execute but deliver professional results. Let’s get started! 🎉


1. Classic Swirl Piping with Buttercream 🍥classic swirl piping with buttercream

The classic swirl is one of the easiest ways to elevate your cake with minimal effort. All you need is a piping bag and a star-shaped nozzle to create this beautiful design.

Ingredients:

  • Your favorite cake
  • Buttercream frosting
  • Piping bag with a star tip

Instructions:

  1. Fill your piping bag with buttercream frosting.
  2. Hold the bag at a 90-degree angle and start piping swirls in a circular motion from the outside to the center of the cake.
  3. Continue until the entire cake is covered in beautiful buttercream swirls.
  4. Add a few sprinkles or edible pearls for an extra touch of elegance. 🌟

2. Drip Cake Design with Ganache 🍫drip cake design with ganache

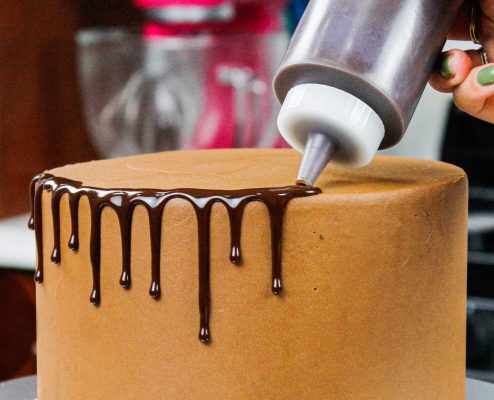
A drip cake is a showstopper that looks impressive but is super simple to achieve. The secret is a smooth ganache that “drips” over the sides of your cake for a modern, stylish effect.

Ingredients:

  • 1 cup heavy cream
  • 8 oz dark chocolate (chopped)
  • Pre-frosted cake

Instructions:

  1. Heat the heavy cream until it just starts to simmer.
  2. Pour the cream over the chopped chocolate and let it sit for a few minutes before stirring until smooth.
  3. Let the ganache cool slightly, then pour it over the top of your pre-frosted cake, allowing it to drip down the sides.
  4. Finish with fresh fruit or edible gold flakes for that high-end bakery look. 🍓✨

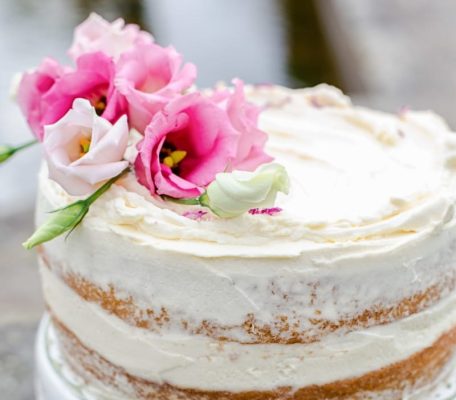
3. Simple Naked Cake with Fresh Flowers 🌸 simple naked cake with fresh flowers

The naked cake trend is perfect for those who love a more rustic, natural look. It’s easy, elegant, and requires minimal frosting – win-win!

Ingredients:

  • Your favorite cake
  • Thin layer of buttercream frosting
  • Fresh, non-toxic flowers

Instructions:

  1. Apply a thin layer of buttercream frosting to your cake, leaving some of the cake layers exposed.
  2. Smooth out the frosting for a polished, clean finish.
  3. Decorate the top of the cake with fresh flowers for a touch of sophistication.
  4. Be sure to use non-toxic, food-safe flowers for decorating. 🌿💐

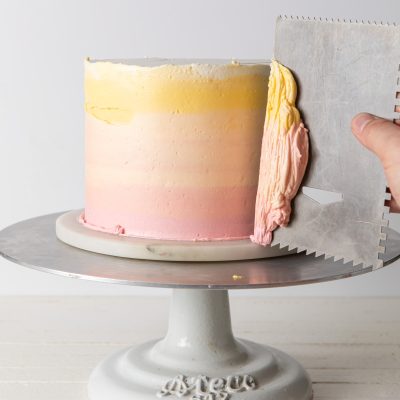
4. Ombre Frosting Effect 🎨 ombre frosting effect

An ombre cake is an excellent way to add a splash of color that looks complicated but is actually very simple to create.

Ingredients:

  • Buttercream frosting in various shades (light to dark)
  • Piping bag
  • Spatula

Instructions:

  1. Start by applying the lightest shade of buttercream to the top of the cake.
  2. Gradually apply darker shades of frosting as you work your way down the cake.
  3. Use a spatula to smooth the frosting and blend the colors for a flawless ombre effect.
  4. Finish with a few edible glitter accents for that final pro touch. ✨🎂

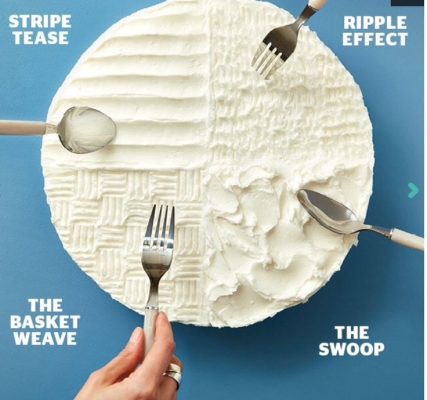
5. Textured Cake with a Fork or Spoon 🥄 textured cake with a fork or spoon

You don’t need fancy tools to create texture on a cake! With just a fork or a spoon, you can give your cake an elegant finish that looks like it came straight from a bakery.

Ingredients:

  • Buttercream-frosted cake
  • Fork or spoon

Instructions:

  1. Once your cake is frosted, take a fork or spoon and gently press it against the frosting.
  2. Create textured lines, swirls, or patterns on the sides of the cake.
  3. This technique works best when the frosting is slightly chilled, so it doesn’t slide around as you create texture.
  4. Add a dusting of powdered sugar or cocoa powder for that extra professional touch. 🎨🍰

Conclusion: Make Your Cakes Look Like a Pro with These Easy Decorating Ideas

With these 5 easy cake decorating ideas, you don’t have to be a professional pastry chef to make your cakes look stunning. Whether you’re creating a modern drip cake, a sophisticated naked cake, or simply adding swirls of buttercream, these techniques are simple enough for beginners but deliver professional-level results. Now go ahead, impress your guests at your next party or celebration! 🎉✨

5 best easy fillings for cakes delicious and simple ideas to elevate your cakes

5 Best Easy Fillings for Cakes: Delicious and Simple Ideas to Elevate Your Cakes

5 best easy fillings for cakes delicious and simple ideas to elevate your cakes

5 Best Easy Fillings for Cakes: Delicious and Simple Ideas to Elevate Your Cakes 🍰✨

5 Best Easy Fillings for Cakes: Delicious and Simple Ideas to Elevate Your Cakes 🍰✨

When it comes to baking, the cake filling can make or break your dessert. A perfect filling adds flavor, moisture, and an extra layer of indulgence. Whether you’re a beginner or an experienced baker, these 5 best easy cake fillings will take your cakes to the next level. From fruit to chocolate, these fillings are not only delicious but also incredibly simple to make! Let’s dive into these delectable options that will impress your guests and make your cakes stand out. 🎂🍫🍓


1. Classic Vanilla Buttercream Filling

Vanilla buttercream is a timeless classic that pairs well with almost any cake flavor. It’s smooth, rich, and incredibly versatile. Here’s how you can whip up this delicious filling:

Ingredients:

  • 1 cup unsalted butter (softened)
  • 4 cups powdered sugar
  • 2 tsp vanilla extract
  • 2-3 tbsp heavy cream

Instructions:

  1. In a large bowl, beat the softened butter until creamy.
  2. Gradually add the powdered sugar and beat until smooth.
  3. Add the vanilla extract and heavy cream and continue mixing until the frosting is fluffy and light. 🎨
  4. Spread generously between cake layers for a creamy, decadent treat. 🍦

2. Fresh Strawberry Filling 🍓

For a fruity, refreshing option, try this fresh strawberry filling. It adds a bright, tangy sweetness that balances out the richness of any cake.

Ingredients:

  • 2 cups fresh strawberries (chopped)
  • ½ cup sugar
  • 2 tbsp cornstarch
  • 1 tbsp lemon juice

Instructions:

  1. In a saucepan, combine the strawberries, sugar, and lemon juice. Cook over medium heat until the strawberries release their juices.
  2. In a small bowl, mix the cornstarch with a little water to create a slurry.
  3. Add the cornstarch mixture to the strawberries and stir until thickened.
  4. Let it cool completely before spreading it between cake layers for a burst of fruity flavor. 🍓🍰

3. Rich Chocolate Ganache Filling 🍫

If you’re a chocolate lover, this chocolate ganache filling will satisfy all your cravings. It’s velvety, smooth, and so easy to make!

Ingredients:

  • 8 oz dark chocolate (chopped)
  • 1 cup heavy cream

Instructions:

  1. Heat the heavy cream in a saucepan until it just begins to simmer (do not boil).
  2. Pour the cream over the chopped chocolate and let it sit for 5 minutes.
  3. Stir the mixture until smooth and glossy.
  4. Let the ganache cool slightly before using it as a decadent filling between your cake layers. 🍫🔥

4. Lemon Curd Filling 🍋

For a zesty, tangy flavor, lemon curd is the perfect choice. This filling pairs wonderfully with light, airy cakes like vanilla or sponge cakes.

Ingredients:

  • 1 cup sugar
  • 3 large eggs
  • 1 tbsp lemon zest
  • ½ cup fresh lemon juice
  • ½ cup unsalted butter (cubed)

Instructions:

  1. In a saucepan, whisk together the sugar, eggs, lemon zest, and lemon juice.
  2. Cook over medium heat, stirring constantly, until the mixture thickens.
  3. Remove from heat and stir in the butter until melted.
  4. Let it cool completely before using it as a tangy and refreshing cake filling. 🍋💛

5. Cream Cheese Filling 🧀

This cream cheese filling is rich, tangy, and pairs perfectly with red velvet, carrot, or spice cakes. It adds a smooth, slightly tart element that balances out sweet cakes.

Ingredients:

  • 1 cup cream cheese (softened)
  • ½ cup unsalted butter (softened)
  • 3 cups powdered sugar
  • 1 tsp vanilla extract

Instructions:

  1. In a bowl, beat the cream cheese and butter together until smooth.
  2. Gradually add the powdered sugar and vanilla, mixing until the filling is creamy and fluffy.
  3. Use this filling between cake layers for a rich and tangy flavor that your guests will love. 🎂🧀

Pro Tips for the Best Cake Fillings:

  • Chill your cakes before filling: This prevents the layers from sliding and makes it easier to frost.
  • Mix and match: Don’t be afraid to combine different fillings like chocolate ganache with fresh fruit for a unique flavor combination.
  • Store in the fridge: If your cake has a perishable filling like cream cheese or fresh fruit, store it in the fridge to keep everything fresh.

Conclusion: Elevate Your Cake with These Simple Fillings

With these 5 easy cake fillings, you can transform any ordinary cake into a show-stopping dessert. Whether you’re craving something rich and chocolatey or light and fruity, there’s a filling here to suit every taste. So go ahead and try them out for your next baking project, and watch your cakes become the star of the party! 🎉🍰

The 5 Best Cake Batters You Need to Try

The 5 Best Cake Batters You Need to Try

The 5 Best Cake Batters You Need to Try

The 5 Best Cake Batters You Need to Try 🍰🎂

Choosing the right cake batter can make all the difference in your baking. Whether you’re baking for a special occasion or a casual treat, the texture and flavor of your cake begin with the batter. Today, we’re diving into the 5 best cake batters every baker should have in their repertoire. Each one brings a unique twist to your baking, ensuring delicious results no matter the occasion! 🎉

1. Classic Vanilla Batter 🍦

The Classic Vanilla Cake Batter is a staple in every baker’s kitchen. It’s simple, versatile, and always delivers a soft, moist cake. The rich vanilla flavor pairs perfectly with almost any frosting or filling, making it an ideal base for customization. If you’re looking for an easy-to-make batter that pleases everyone, vanilla is your go-to!

Why You’ll Love It:

  • Light and fluffy texture
  • Perfect for layering
  • Works with any flavor combination

2. Rich Chocolate Batter 🍫

Craving something more indulgent? The Rich Chocolate Cake Batter is a chocoholic’s dream. Dense, fudgy, and packed with deep chocolate flavor, this batter creates cakes that are irresistible. Pair it with a chocolate ganache or buttercream for the ultimate dessert experience.

Why You’ll Love It:

  • Decadent and rich
  • Perfect for chocolate lovers
  • Pairs well with fruit fillings like raspberry or cherry 🍒

3. Red Velvet Batter ❤️

Red Velvet Cake has a special place in our hearts (and stomachs!). With its vibrant red color and delicate cocoa flavor, this batter creates a moist, tender cake with just a hint of tanginess from the buttermilk. Add cream cheese frosting, and you’ve got a crowd-pleaser for any occasion!

Why You’ll Love It:

  • Eye-catching color
  • Subtle chocolate flavor
  • Pairs best with tangy cream cheese frosting

4. Lemon Sponge Batter 🍋

For those who enjoy a refreshing citrus twist, the Lemon Sponge Cake Batter is a must-try. It’s light, fluffy, and bursting with the zesty flavor of fresh lemons. This batter is perfect for a summer dessert or when you want something light and refreshing.

Why You’ll Love It:

  • Bright, tangy flavor
  • Light, airy texture
  • Pairs beautifully with lemon curd or whipped cream 🍋🍰

5. Funfetti Batter 🎉

Looking for something playful and colorful? The Funfetti Cake Batter is sure to bring out the joy in any celebration! This classic vanilla batter is infused with colorful sprinkles, making it a hit at birthday parties, kids’ events, or anytime you want to add some fun to your baking.

Why You’ll Love It:

  • Perfect for celebrations 🎂
  • Fun and colorful
  • Pairs with any frosting flavor

Bonus Tips for Perfect Cake Batter 📝

  • Use Room-Temperature Ingredients: For a smoother batter and better rise.
  • Don’t Overmix: Overmixing can lead to dense cakes. Mix until just combined.
  • Accurate Measurements: Always measure ingredients precisely to achieve the best results.

Which Cake Batter Will You Try First? 🍰

Now that you know the best cake batters, it’s time to roll up your sleeves and get baking! Whether you’re craving the richness of chocolate, the lightness of lemon, or the classic taste of vanilla, these batters will ensure your cakes turn out delicious every time. Happy baking! 🎉

buttercream

Mastering Buttercream Basics: A Guide to Perfectly Frosted Cakes

Mastering Buttercream Basics: A Guide to Perfectly Frosted Cakes

Mastering Buttercream Basics: A Guide to Perfectly Frosted Cakes

Buttercream is the cornerstone of cake decorating, offering endless versatility, rich flavor, and a smooth finish that transforms any cake into a work of art. Whether you’re crafting a classic birthday cake, a delicate wedding tier, or just a sweet treat for a friend, mastering the basics of buttercream is essential. This tutorial will guide you through the process, from making the perfect buttercream to expertly frosting your cake. Let’s dive in!

Step 1: Understanding Buttercream

Before we get started, let’s understand what buttercream is and why it’s the go-to frosting for many bakers. Buttercream is a blend of butter (or sometimes a combination of butter and shortening) and sugar, with added flavorings like vanilla, chocolate, or fruit. Its appeal lies in its creamy texture, rich taste, and ease of use. There are several types of buttercream, including American, Swiss meringue, and Italian meringue. In this tutorial, we’ll focus on American buttercream, the simplest and most common type, perfect for both beginners and seasoned bakers.

Step 2: Gather Your Ingredients

To make a basic American buttercream, you’ll need the following ingredients:

  • 1 cup (2 sticks) unsalted butter, room temperature
  • 4 cups powdered sugar, sifted
  • 1/4 cup heavy cream or milk
  • 2 teaspoons vanilla extract
  • Pinch of salt

For chocolate buttercream, simply add 3/4 cup of unsweetened cocoa powder. For fruit-flavored buttercream, add a few tablespoons of fruit puree or jam.

Step 3: Make the Buttercream

  1. Beat the Butter:

Start by placing your room-temperature butter in the bowl of a stand mixer fitted with a paddle attachment, or use a hand mixer. Beat the butter on medium speed for about 3-5 minutes until it’s light and fluffy. The goal here is to incorporate air into the butter, which will give your frosting a smooth and creamy texture.

  1. Add the Sugar:

Gradually add the sifted powdered sugar, one cup at a time, beating on low speed until incorporated. Sifting the sugar is crucial, as it removes any lumps and ensures a smooth buttercream. Once all the sugar is added, increase the mixer speed to medium and beat for another 2-3 minutes.

  1. Add the Liquid:

With the mixer on low speed, slowly add the heavy cream or milk, vanilla extract, and a pinch of salt. If you’re making chocolate buttercream, add the cocoa powder at this stage. Increase the speed to medium-high and beat for an additional 3-5 minutes. The buttercream should be smooth, creamy, and easy to spread. If the frosting is too thick, add more cream, one tablespoon at a time, until you reach the desired consistency. If it’s too thin, add more powdered sugar.

Step 4: Prepare Your Cake

Before frosting your cake, make sure it’s properly prepared. This means your cake should be completely cool. Frosting a warm cake will cause the buttercream to melt and slide off, leading to a messy finish. Ideally, bake your cake a day in advance and refrigerate it. This not only makes the cake easier to frost but also helps the flavors develop.

  1. Level the Cake:

Use a serrated knife or a cake leveler to remove any domes from the top of your cake layers. Leveling your cake ensures that your layers stack evenly and your final cake has a professional, polished look.

  1. Crumb Coat:

Apply a thin layer of buttercream, known as a crumb coat, to the entire cake. The crumb coat locks in any loose crumbs, preventing them from mixing with your final layer of frosting. After applying the crumb coat, chill the cake in the refrigerator for 15-30 minutes to set the frosting.

Step 5: Frosting the Cake

Now that your cake is prepped, it’s time to frost it with buttercream. This step is where you can truly let your creativity shine.

  1. Apply the Buttercream:

Start by adding a generous dollop of buttercream to the top of your cake. Using an offset spatula, spread the frosting evenly over the top, working from the center outward. Don’t worry about getting it perfect at this stage; the goal is to apply an even layer of frosting.

  1. Frost the Sides:

Once the top is covered, apply more buttercream to the sides of the cake. Use your spatula to spread the frosting evenly, rotating the cake as you go. A turntable makes this process much easier, allowing you to spin the cake while you frost it.

  1. Smooth the Frosting:

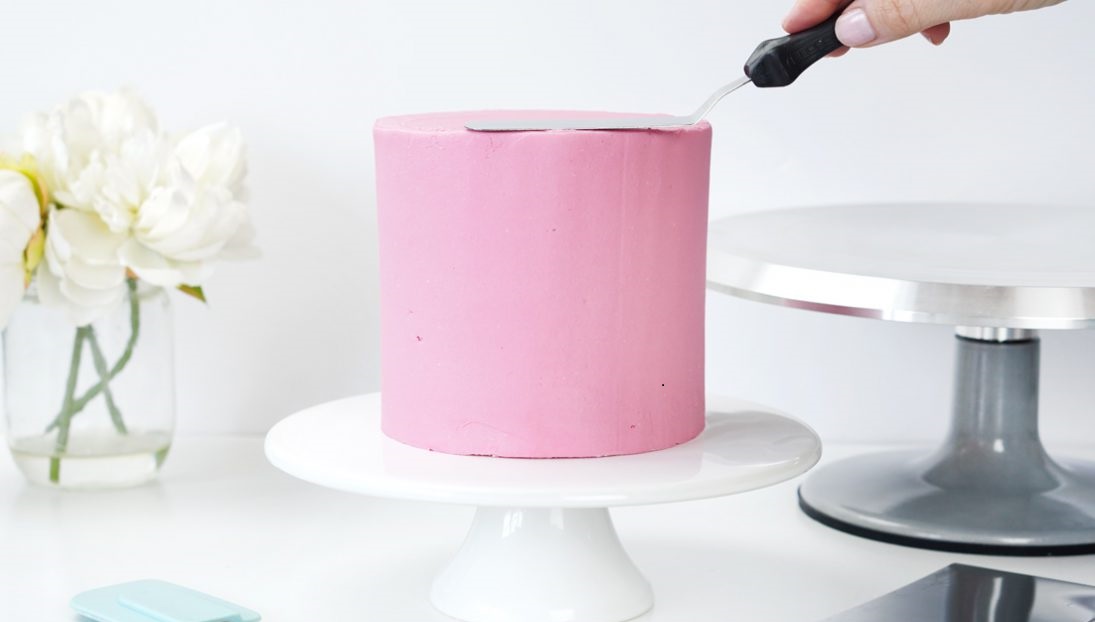
To achieve a smooth finish, use a bench scraper or cake smoother. Hold the scraper against the side of the cake at a slight angle and rotate the turntable, scraping away excess frosting. Wipe off the scraper after each pass to avoid smearing buttercream back onto the cake. For the top, hold your spatula at an angle and smooth the frosting toward the center.

  1. Final Touches:

Once you’re satisfied with the smoothness, it’s time to add any final touches. This could be piping decorative borders with a piping bag and tip, adding sprinkles, or even using edible flowers for a more elegant look.

Step 6: Piping Decorations

If you want to add some extra flair to your cake, piping decorations is a fantastic way to do it. Here’s a basic guide to get you started:

  1. Choose Your Tip:

Select the piping tip that suits your design. A star tip creates beautiful rosettes and borders, while a round tip is perfect for writing and dots. Fill your piping bag with buttercream, making sure not to overfill it, as this can make piping difficult.

  1. Practice Your Technique:

Before piping directly onto your cake, practice on a piece of parchment paper. This helps you get a feel for the pressure needed to create consistent designs.

  1. Pipe on the Cake:

Once you’re confident, pipe your designs onto the cake. Start with the borders, then add any other decorations. If you make a mistake, don’t worry—simply scrape off the frosting and try again.

Step 7: Troubleshooting Common Issues

Even the best bakers encounter challenges. Here’s how to troubleshoot some common buttercream issues:

  1. Buttercream Too Thick:

If your buttercream is too thick and difficult to spread, add a little more cream, one tablespoon at a time, until it reaches a spreadable consistency.

  1. Buttercream Too Thin:

If your buttercream is too thin, add more powdered sugar, a few tablespoons at a time, until it thickens.

  1. Air Bubbles in Buttercream:

If your buttercream has air bubbles, beat it on low speed for a few minutes to smooth it out. You can also press the frosting against the side of the bowl with a spatula to remove excess air.

  1. Frosting Melting:

If your buttercream is melting, your butter may have been too soft, or your kitchen may be too warm. Place the frosting in the refrigerator for 10-15 minutes to firm up, then beat it again before using.

Step 8: Storing and Serving

Once your cake is frosted and decorated, you can either serve it immediately or store it for later.

  1. Storing:

If you need to store the cake, cover it lightly with plastic wrap or place it in a cake box. Buttercream cakes can be stored at room temperature for 2-3 days or in the refrigerator for up to a week. Before serving, let the cake come to room temperature for the best texture and flavor.

  1. Serving:

When cutting your cake, use a sharp knife and wipe it clean between slices for neat, clean cuts. Enjoy the fruits of your labor, and bask in the compliments that are sure to come your way!

Final Thoughts

Mastering buttercream basics is a fundamental skill that opens up a world of possibilities in cake decorating. Whether you’re creating a simple birthday cake or an elaborate wedding masterpiece, the perfect buttercream will elevate your creation to new heights. Remember, practice makes perfect, and each cake you frost is an opportunity to refine your skills.

Happy baking! 🎂