How to Create Perfect Buttercream Rosettes: A Step-by-Step Guide 🌹🎂
How to Create Perfect Buttercream Rosettes: A Step-by-Step Guide 🌹🎂
Continuing our cake decorating series, we’ve covered the essentials: from the best cake batters and fillings to professional-looking decorations and frosting recipes. Now, it’s time to focus on one of the most classic and visually stunning techniques in cake decorating: buttercream rosettes. These elegant, swirling flowers can instantly elevate any cake, giving it a refined, bakery-worthy finish.
In this article, we’ll walk you through a simple step-by-step process to master buttercream rosettes like a pro! Whether you’re decorating cupcakes, layer cakes, or even cookies, these beautiful rosettes will be your go-to technique for adding an extra touch of class. 💐🍰
What You’ll Need:
- Buttercream frosting (a stable, firm texture works best)
- Piping bags
- Open star piping tip (Wilton 1M or similar)
- Food coloring (optional)
- Offset spatula
- A cooled, crumb-coated cake (or cupcake)
Step-by-Step: How to Pipe Buttercream Rosettes 🌸
Prepare Your Buttercream Frosting First, make sure your buttercream frosting has a stiff consistency—this will help your rosettes hold their shape. If needed, chill it in the fridge for about 15-20 minutes before use.
Fill Your Piping Bag Attach your open star piping tip to your piping bag and fill it with buttercream. If you want multicolored rosettes, you can stripe the bag with different colors of buttercream for a beautiful gradient effect.
Hold the Bag Properly Hold your piping bag at a 90-degree angle over the cake surface. Apply even pressure with your dominant hand while using the other hand to guide the bag.
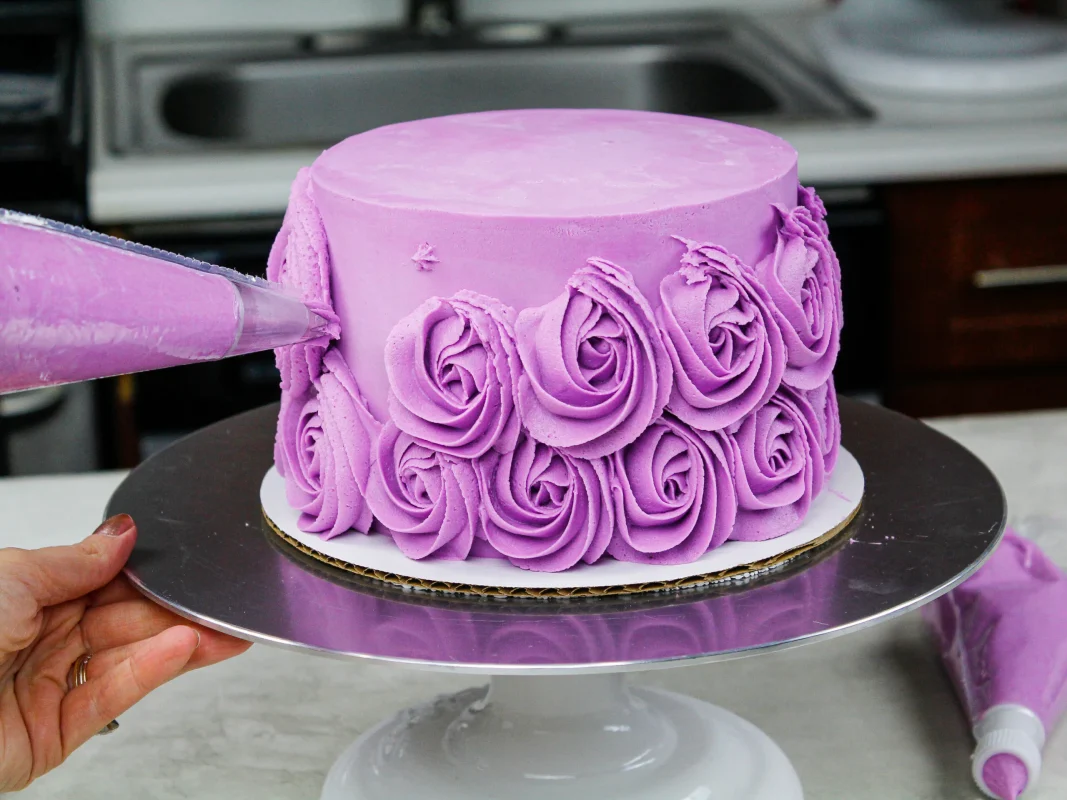
Start Piping the Rosette Begin piping from the center of where you want the rosette to be. Start in the middle and, using a spiral motion, pipe outward to create a swirl. Continue until you’ve created a rose-like shape. Release pressure gently as you reach the end to make a clean finish. 💫
Spacing Your Rosettes Continue piping rosettes around the cake, leaving a small gap between each for a more delicate look. If you want a fuller effect, pipe the rosettes close together to cover the entire surface.
Smooth the Edges (Optional) If you notice any imperfections, use an offset spatula to gently fix the edges. If your buttercream has softened, chill the cake briefly to firm up the designs.
Tips and Tricks for the Perfect Rosettes:
- Temperature Matters: If your buttercream is too soft, your rosettes may lose their shape. Cool the buttercream if necessary.
- Consistent Pressure: Apply even pressure throughout piping for smooth, uniform rosettes.
- Practice First: Try piping a few rosettes on a piece of parchment paper before decorating your cake to get comfortable with the motion.
Decorating Ideas Using Buttercream Rosettes 🌷
- Ombre Rosettes: Start with one color of buttercream and gradually add more food coloring to achieve a gradient effect as you pipe.
- Rosette Cupcakes: Add a single rosette to the top of cupcakes for a simple yet elegant design.
- Rosette Borders: Use smaller rosettes to create a border around the top or bottom edge of your cake.
Final Thoughts: Buttercream rosettes are a versatile and elegant addition to any cake. With practice, this beautiful decoration technique will become second nature. Whether you’re making a birthday cake, wedding cake, or just a special treat, rosettes will always impress. 🌹💖
